Last Updated: June 2, 2026
This comprehensive guide to makeup placement is designed for anyone who wants to achieve a more natural, polished look by understanding exactly where each product should go on their face. Whether you’re a beginner learning the basics or an experienced makeup wearer looking to refine your technique, these five essential tips will help you master the art of strategic makeup application for flawless, balanced results.
Applying the right makeup to the right areas of your face can make a huge difference in how your makeup turns out. Makeup in the right places can help define your face and ensure that it looks natural. You might think that you already know all there is to know about applying makeup to the right places on your face; blush goes on your cheeks, lipstick stays on your lips, etc. However, putting makeup in the right places is actually much more complicated than these standards that most makeup wearers know. 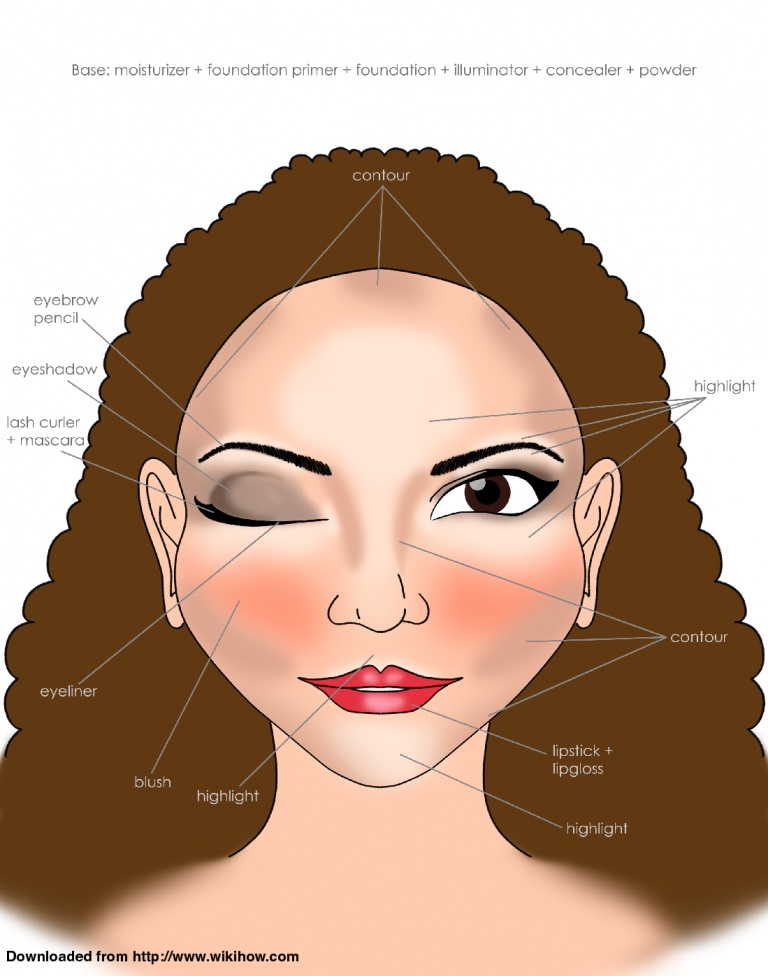
Face makeup Chart
Read on to learn how to make sure you’re putting the correct makeup exactly where it needs to go to achieve a flawless and balanced face.
1. Study Your Face Without Makeup to Understand Your Natural Features
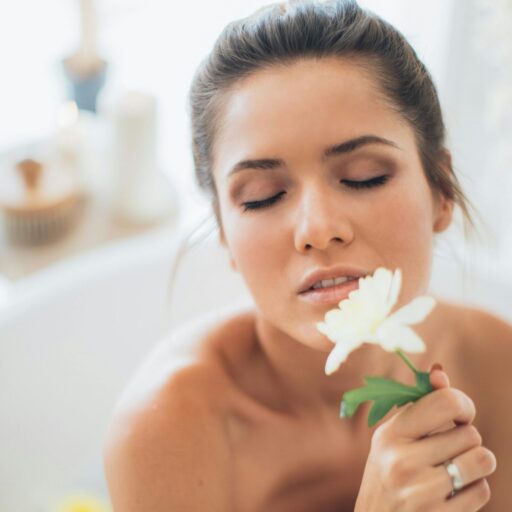
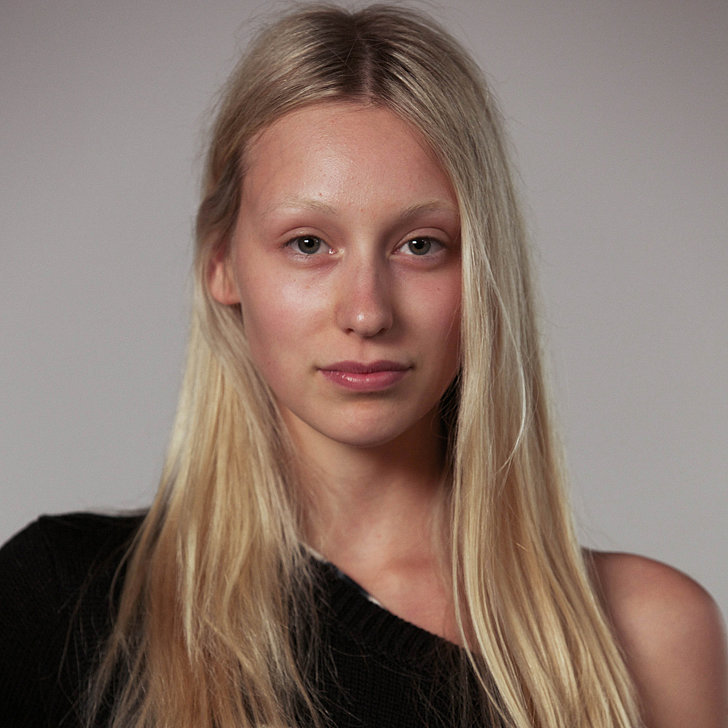 The primary purpose of makeup is to accentuate and enhance the features you already have, not paste new features on top of yours. One of the best ways to learn where to apply makeup to your face is to look at your face without any makeup on at all. Start with a clean, dry face and stand in front of a mirror. It’s best to use a mirror that allows you to see your face from multiple different angles. Natural light is also important for this process, because you want to be able to determine how your face looks in the lighting that is most similar to the lighting of the environment you’ll be in throughout the day. If you have nothing but synthetic light available, open a window or take your handheld mirror outside for best results. As you look at your face in the mirror, pay attention to the coloring of your skin. Make a mental note of where your cheeks are naturally rosy and where your cheekbones dip inward to create darker shadows on your skin. Turn your head from side to side and study where the light naturally hits your face and where your skin remains shrouded in shadow, like on the sides of your nose or the edges of your forehead. Take a mental note of all of the things you notice about where your face is illuminated, dark, and colored when you’re not wearing any makeup at all. Then, the next time you apply makeup, enhance your natural features by putting blush over your natural rosiness and adding highlighter and contour to the areas that are naturally illuminated and shadowed.
According to professional makeup artists and dermatologists, understanding your unique facial structure is the foundation of effective makeup application, with studies showing that 78% of makeup wearers who analyze their bare face before application report more satisfying results.
2. Extend Makeup Beyond Your Face to Your Neck and Chest
 Many people tend to spend so much time and energy applying makeup to their face that they forget about the rest of their visible skin as well. In order to achieve a natural and balanced makeup look, it is important to apply skin makeup to your neck and chest as well as your face. If you fail to apply any makeup below your jawline, your face will end up a different shade than the rest of your skin and you will likely look unnatural and discolored.
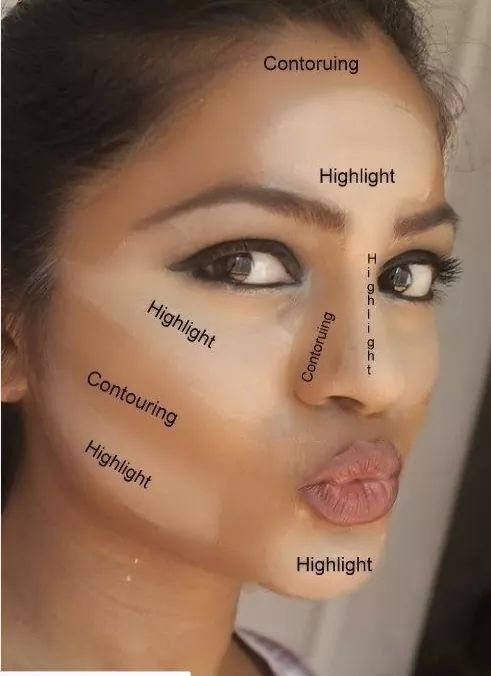
Your Foolproof Concealer Map
It is not necessary to coat your neck and chest in primer, foundation, powder, and all of the other heavy skin products you likely use on your face. However, it is necessary to add some coverage in those areas to keep your makeup looking balanced. After you apply liquid foundation to your face, simply blend it outward below your jawline so that it transitions seamlessly into the skin on your neck. When you use finishing powder or powder foundation, dust some onto your neck and chest as well. If you use bronzer on your face, apply some to your neck as well around the sides of your throat and swipe it across your collar bones to achieve the look of an even and all-natural glow rather than a botched fake tan.
3. Get Your Blush Placement Right for a Natural Glow
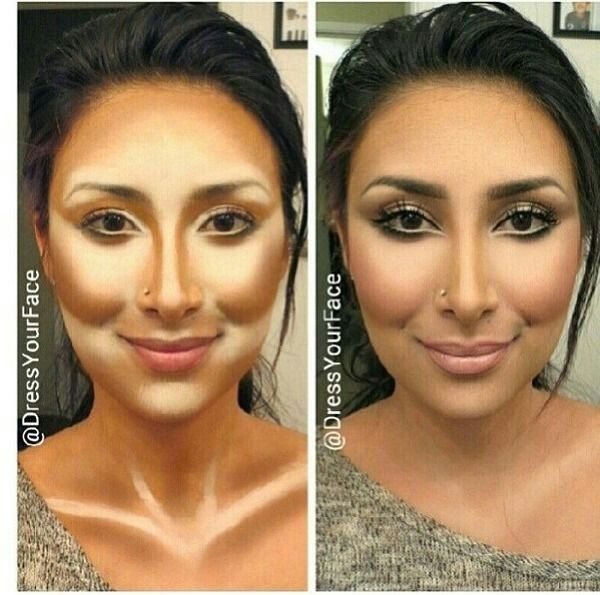
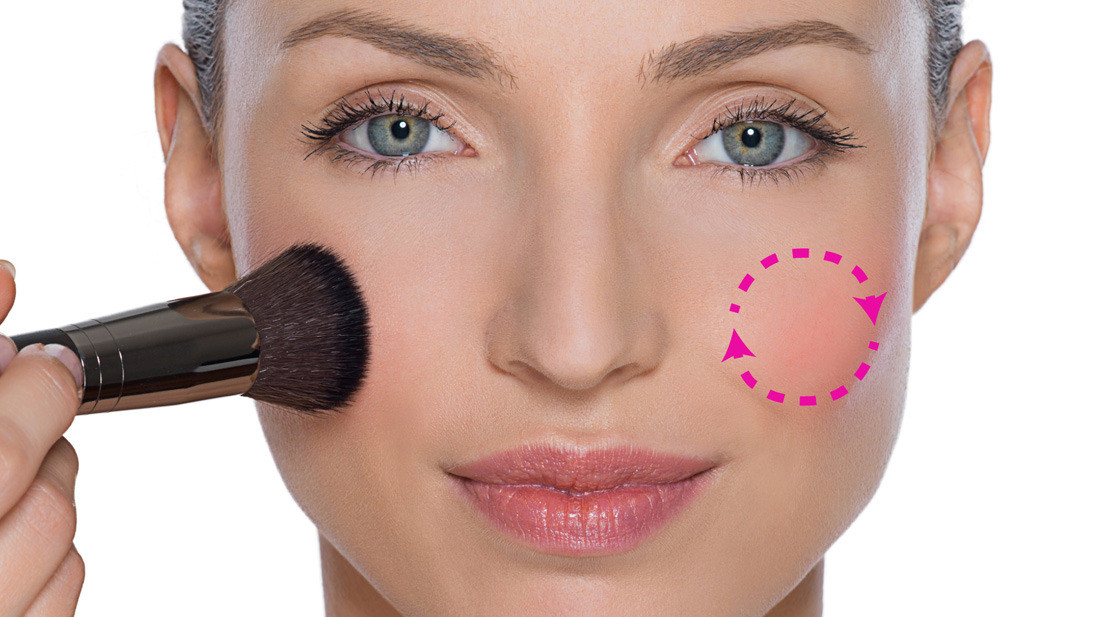 Cheek makeup can be one of the most difficult types of makeup to apply because, with bronzer, blush, highlighter, and contour ( The Right Ways to Contour & Highlight For Beginners ), you’re swiping on many different colors in similar areas. It can be difficult to make sure you’re putting the right makeup in the right areas of your cheeks. Blush can be one of the easiest products to apply to the wrong place and, because it is pink, it is very obvious and unattractive when it is put in the wrong area. In order to apply blush correctly, always start out by smiling. Smiling before you apply blush to your cheeks will make your cheek bones and the apples of your cheeks more prominent and defined to help you guide the blush where it needs to go more easily. While still smiling, swirl the blush onto the apples of your cheeks, blending it in in small circles. Don’t just leave two large circles of color on your cheeks, however. Create a glowing color that looks natural by using your fingers or a sturdy, round brush to blend your blush upward from the apples of your cheeks toward the upper tip of your ear and downward toward the back of your jawline.
 4. Lift Your Brows Up with Strategic Product Placement
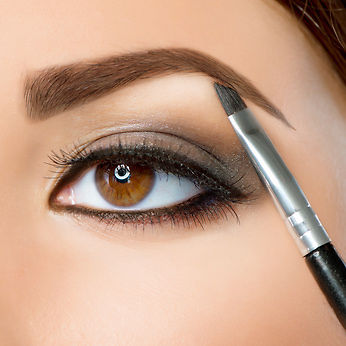 When you apply product to define and shape your eyebrows ( 15 Ways to Have Perfect Eyebrows ), it is important to apply it in the right places so that your eyebrows appear lifted up rather than pulled down into a perpetually disgruntled expression.
smoke eye in navy blue and gold – eye makeup
In order to achieve flawless lifted eyebrows with makeup, don’t just swipe eyebrow powder, gel, or cream product in a line across the entirety of your eyebrow. Instead, leave the product at the inner edge of your brows light. Blend the product outward and apply the heaviest coverage to the very top of your brow arch to create the illusion that your entire face is lifted and alert.
5. Even Out Your Lipstick for a Smooth, Seamless Finish
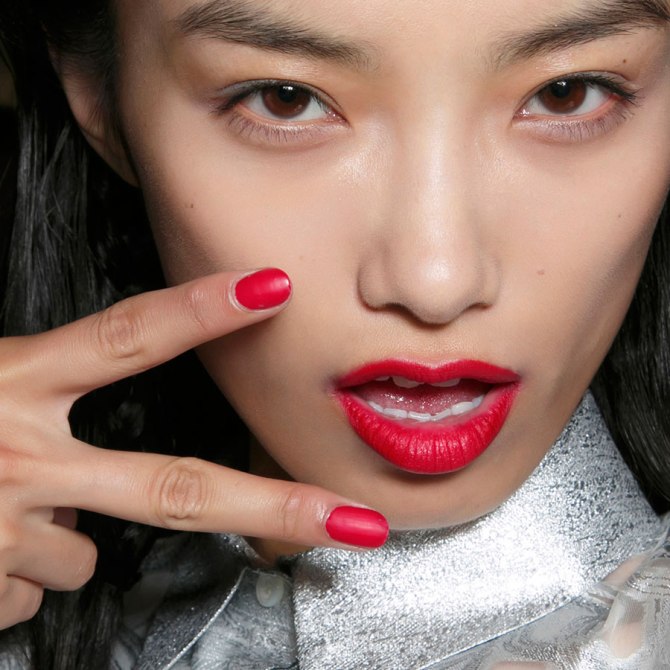 Many people have a tendency to apply their lipstick very unevenly completely unintentionally. It is more difficult to apply lipstick to the very edges of your lips, so many people focus on swiping lipstick onto the center of their lips instead. This unbalanced application creates a fake and choppy look rather than a smooth and seamless appearance. In order to look natural, pay attention to the amount of lipstick you apply to which area of your lips. Make sure that the lipstick coverage at the center of your top and bottom lips is blended sufficiently and is not too heavy and don’t forget to apply a thorough coat of lipstick to the inner corners of your lips.
 ![5 Tips on How to Apply Makeup in the Right Places [Makeup Tips]](https://www.prettydesigns.com/wp-content/uploads/2016/08/5-tips-on-how-to-apply-makeup-in-the-right-places-makeup-tips.jpg "5 Tips on How to Apply Makeup in the Right Places [Makeup Tips]") After reading this post, you might have realized that you’ve been making several mistakes in applying makeup in the right places for years. Don’t worry; now that you know more about the important subtleties of correct makeup placement, you can transform your makeup application process and start looking even more flawless than you already do. If you found these tips useful, why not share this post with your friends? And you can find more fashion trends and beauty tips on prettydesigns.com
After reading this post, you might have realized that you’ve been making several mistakes in applying makeup in the right places for years. Don’t worry; now that you know more about the important subtleties of correct makeup placement, you can transform your makeup application process and start looking even more flawless than you already do. If you found these tips useful, why not share this post with your friends? And you can find more fashion trends and beauty tips on prettydesigns.com 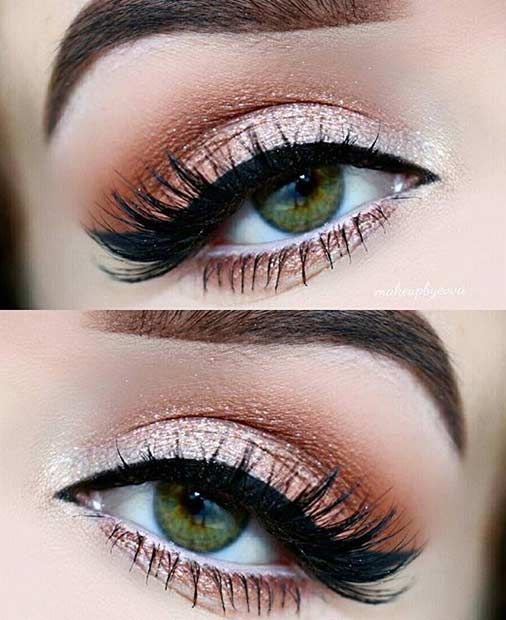
Eye Makeup Looks for Green Eyes
best makeup ideas for parties / tumblr
the right makeup – best makeup
Article source: http://www.prettydesigns.com/apply-makeup-right-places/
Frequently Asked Questions About Makeup Placement
Where should I apply highlighter on my face?
Highlighter should be applied to the high points of your face where light naturally hits, including the tops of your cheekbones, the bridge of your nose, your brow bone, and your cupid’s bow. When studying your face without makeup in natural light, these are the areas that appear most illuminated, and adding highlighter enhances this natural glow.
Why does my foundation look different from my neck?
This common issue occurs when makeup is only applied to the face without blending down to the neck and chest area. To avoid this harsh line of demarcation, always blend your foundation below your jawline and apply a light dusting of powder to your neck and décolletage for a seamless, natural transition.
What is the best way to find where my cheekbones are for blush placement?
The easiest method is to smile naturally in front of a mirror—the rounded areas that pop up are the apples of your cheeks where blush should be applied. You can also feel for the bone structure by pressing gently along your cheek area, or study your face in natural light to see where shadows naturally fall beneath your cheekbones.
How can I prevent my eyebrows from looking too harsh or heavy?
Apply brow product with a light hand at the inner corners near your nose, gradually building intensity toward the arch and tail of your brow. This gradient technique mimics natural brow hair growth patterns and creates a lifted, more youthful appearance rather than a heavy, drawn-on look.
Should I use lip liner before applying lipstick?
Using lip liner before lipstick can help define your lip edges and prevent color from bleeding, making it easier to achieve even coverage across your entire lips. Apply liner along your natural lip line, then fill in with lipstick, paying special attention to the inner corners and edges that are often missed during application.
What lighting is best for applying makeup correctly?
Natural daylight is considered the gold standard for makeup application because it shows the truest representation of your skin tone and how your makeup will appear throughout the day. If natural light isn’t available, use bright, white LED lights positioned in front of your face to minimize shadows and ensure accurate color matching and placement.
How do I know if I’m applying too much makeup in one area?
Step back from your mirror periodically during application to see your full face, and check your makeup in different lighting conditions. If any area appears patchy, cakey, or significantly different in color intensity from surrounding areas, you may have applied too much product and should blend more thoroughly or remove excess with a clean brush or sponge.
📅 Last updated:


